
UI Plugins
UI plugins allow developers to add new visualizations and analysis tools directly into the Perfetto interface. By leveraging a rich set of extension points, plugins can tailor Perfetto to specific use cases.
This guide provides comprehensive instructions on how to create and contribute UI plugins to Perfetto.
If this is your first time contributing to Perfetto, please first follow Perfetto getting started and then UI getting started.
Note: All plugins are currently in-tree, that is they're located in the open source Perfetto codebase and served along with the public build of Perfetto located at https://ui.perfetto.dev. If you wish to add closed-source plugins, you will need to fork and host your own version of Perfetto. There is no way, currently, to side-load closed-source plugins.
The plugins that start with 'com.example' here provide live examples of the features listed in this doc, so please do take a look at those if one is present for your particular feature.
The public plugin API, which you'll be using in this doc, can be browsed here.
Getting started
Copy the skeleton plugin:
cp -r ui/src/plugins/com.example.Skeleton ui/src/plugins/<your-plugin-name>Now edit ui/src/plugins/<your-plugin-name>/index.ts. Search for all instances
of SKELETON: <instruction> in the file and follow the instructions.
Notes on naming:
- Plugins should be prefixed with the reversed components of a domain name you
control. For example if
example.comis your domain your plugin should be namedcom.example.Foo. - Avoid including the term 'plugin' in the name.
- The
pluginIdand directory name must match. - The prefix
dev.perfetto.is reserved for plugins maintained by the core Perfetto team.
Start the dev server
ui/run-dev-serverNow navigate to localhost:10000
Enabling your plugin
- Navigate to the plugins page: localhost:10000/#!/plugins.
- Ctrl-F for your plugin name and enable it.
- Enabling/disabling plugins requires a restart of the UI, so refresh the page to start your plugin.
You can request for your plugin to be enabled by default. Follow the default plugins section for this.
Adding Styles
To add custom styles to your plugin, create a styles.scss file in your
plugin's directory, next to your index.ts file.
ui/src/plugins/<your-plugin-name>/styles.scss
The build system will automatically detect this file and include it in the main stylesheet. You can use any standard SCSS syntax in this file.
For example, to change the background color of a component in your plugin:
.pf-my-plugin-component {
  background-color: blue;
}
All class names should be prefixed with pf- to avoid conflicts with other
libraries.
It's recommended to scope your styles to your plugin to avoid conflicts with other plugins or the core UI. A good practice is to wrap your plugin's UI in a container with a unique class name.
Upload your plugin for review
- Update
ui/src/plugins/<your-plugin-name>/OWNERSto include your email. - Follow the Contributing instructions to upload your PR to GitHub.
- Once uploaded add
stevegolton@google.comas a reviewer for your PR.
Plugin lifecycle
onActivate is called once when the app first starts up, passing in the App
object. This object can be used to register core extensions such as pages,
commands and sidebar links, which will be available before a trace is loaded.
When the user loads a trace the plugin class is instantiated and onTraceLoad
is called passing in the Trace object. This object can be used to register
extensions which are scoped to the lifetime of that particular trace such as
tracks, tabs and workspaces.
All extensions that can be registered on the app object can also be registered
on the trace object, but these extensions only last for the lifetime of the
trace. For example, a command registered on the trace object will only be
available while that trace is loaded, and will disappear when switching traces.
Typically, if this is done in the onTraceLoad() hook then the extension is
re-registered automatically with every new trace that is loaded.
Note: Don't put any code the main body of the plugin file as there is no guarantee the core will be set up by that point. Instead, wait for the core to call the plugin either via
onActivateoronTraceLoad.
To demonstrate the lifecycle of a plugin, let's examine a minimal plugin that implements the key lifecycle hooks and logs to the terminal:
export default class implements PerfettoPlugin {
  static readonly id = 'com.example.MyPlugin';

  static onActivate(app: App): void {
    // Called once on app startup
    console.log('MyPlugin::onActivate()', app.pluginId);
    // Note: It's rare that plugins would need this hook as most plugins are
    // interested in trace details. Thus, this function can usually be omitted.
  }

  constructor(trace: Trace) {
    // Called each time a trace is loaded
    console.log('MyPlugin::constructor()', trace.traceInfo.traceTitle);
  }

  async onTraceLoad(trace: Trace): Promise<void> {
    // Called each time a trace is loaded
    console.log('MyPlugin::onTraceLoad()', trace.traceInfo.traceTitle);
    // Note this function returns a promise, so any any async calls should be
    // completed before this promise resolves as the app using this promise for
    // timing and plugin synchronization.
  }
}
Run this plugin with devtools to see the log messages in the console, which should give you a feel for the plugin lifecycle. Try opening a few traces one after another.
Performance
onActivate() and onTraceLoad() should generally complete as quickly as
possible, however sometimes onTraceLoad() may need to perform async operations
on trace processor such as performing queries and/or creating views and tables.
Thus, onTraceLoad() should return a promise (or you can simply make it an
async function). When this promise resolves it tells the core that the plugin is
fully initialized.
Note: It's important that any async operations done in onTraceLoad() are awaited so that all async operations are completed by the time the promise is resolved. This is so that plugins can be properly timed and synchronized.
// GOOD
async onTraceLoad(trace: Trace) {
  await trace.engine.query(...);
}

// BAD
async onTraceLoad(trace: Trace) {
  // Note the missing await!
  trace.engine.query(...);
}
Plugin API
For more detailed information and documentation please consult the API source in
ui/src/public/ or
one of the many example plugins (that start with com.example.*) in
ui/src/plugins/.
Getting the trace object from the app object
When a trace is loaded, app.trace will return the current trace object, or
undefined if no trace is loaded.
Querying the trace
As soon as the plugin obtains a trace, it can execute queries against it using
the trace's engine property.
const result = await trace.engine.query('select * from slice');
const schema = {id: NUM, ts: LONG, dur: LONG, name: STR};
for (const iter = result.iter(schema); iter.valid(); iter.next()) {
  console.log(iter.id, iter.ts, iter.dur, iter.name);
}
Typically queries returns a list of rows, which can be iterated through like in the example.
The schema:
- Informs the engine what types we expect the columns to have and what JavaScript type to convert each column to. An error is thrown if the returned typed cannot be coerced into the desired one.
- Informs typescript what types to expect at compile time, the
iterobject assumes the same type as that of the schema.
Note: The problem with JavaScript numbers. A javascript number type is actually a double precision float, and thus can only represent integers up to 2^53-1. Trace processor can represent 64 bit integers, so when converting to js numbers, we can lost precision. THis is a problem for large numbers such as timestamps and durations.
The possible schema types are as follows:
NUM: Represents a numeric value. Converts to JavaScriptnumber.STR: Represents a string value. Converts to JavaScriptstring.LONG: Represents a large integer value (64-bit). Converts to JavaScriptbigint.BLOB: Represents binary data (Binary Large Object). Converts to JavaScriptUint8Array.NUM_NULL: Represents a numeric value that can also benull. Converts to JavaScriptnumber | null.STR_NULL: Represents a string value that can also benull. Converts to JavaScriptstring | null.LONG_NULL: Represents a large integer value (64-bit) that can also benull. Converts to JavaScriptbigint | null.BLOB_NULL: Represents binary data that can also benull. Converts to JavaScriptUint8Array | null.UNKNOWN: Represents a column where the specific type is not strictly defined or can benull. It's often used as a base type from which nullable types extend. When not specified, all integer values will be converted to a bigint.
Selections
Plugins can programmatically control what is selected in the Perfetto UI. This
is primarily done using methods available on the trace.selection object.
You typically want to select an entity to find out more information about that entity, which is displayed in the current selection panel. Selections are usually invoked by the user, but can be controlled programmatically too.
You can always access the current selection details via
trace.selection.selection. This object has a kind property (e.g.,
'track_event', 'area', 'note', 'empty') and other properties specific to the
type of selection. The optional SelectionOpts object can be passed to
selection methods to influence UI behaviors like automatically scrolling to the
selection or switching to the "Current Selection" tab.
Selection Options (SelectionOpts)
The SelectionOpts object can be passed to most selection methods to customize
the UI's response to a new selection. It has the following optional properties:
switchToCurrentSelectionTab?: boolean: Iftrue(the default), the UI will automatically switch to the "Current Selection" tab in the details panel. Set tofalseto keep the current tab active.scrollToSelection?: boolean: Iftrue, the timeline will attempt to scroll to bring the newly selected item into view. The default isfalse.
Selecting a Track Event (event, slice, counter sample, etc)
To select an individual event on a track:
trace.selection.selectTrackEvent('my.track', 123);Selecting an Area (Time Range)
To select a specific time range, potentially across multiple tracks. The Area
object requires start (time), end (time), and an array of trackUris
(string[]).
trace.selection.selectArea({
  start: Time.fromRaw(123n), // Time in nanoseconds (bigint)
  end: Time.fromRaw(456n), // Time in nanoseconds (bigint)
  trackUris: ['track.foo', 'track.bar'], // Array of track URIs to include
});
Selecting an Entire Track
Selecting an entire track highlights it in the timeline and displays track details in the drawer.
trace.selection.selectTrack('my.track');Selecting an Event via SQL Table and ID
If you have an event's ID from a specific SQL table (e.g., slice table) but
not its direct track URI, Perfetto can attempt to resolve and select it. Certain
tracks do directly represent rows in the well known tables but it's up to the
plugin developers whether or not these are wired up properly.
trace.selection.selectSqlEvent('slice', 123);Clearing the Current Selection
To deselect whatever is currently selected in the UI:
trace.selection.clearSelection();Pinning Tracks
A common task for plugins are to pin certain interesting tracks (usually as a result of a command).
This can be achieved by finding the appropriate track in the workspace and
calling its pin() method. This will pin it to the top of its parent workspace.
trace.workspace
  .flatTracks()
  .find((t) => t.name.startsWith('foo'))
  .forEach((t) => t.pin());
Workspaces
Workspaces are the primary containers for organizing and displaying tracks in the Perfetto UI. They allow users to manage different views of trace data, save track layouts, and switch between them. Plugins can interact with workspaces to add, remove, and arrange tracks, as well as create and manage custom workspaces.
The main interfaces and classes related to workspaces are WorkspaceManager,
Workspace, and TrackNode. These are typically accessed via
trace.workspaces (for the manager) and trace.workspace (for the current
active workspace) once a trace is loaded.
Workspace Manager (trace.workspaces)
The WorkspaceManager provides an overview and control over all available
workspaces. It's accessible via trace.workspaces.
Key methods and properties:
currentWorkspace: Workspace: A read-only property that refers to the currently active workspace. This is the same instance astrace.workspace.all: ReadonlyArray<Workspace>: A read-only array of all workspaces currently loaded.createEmptyWorkspace(displayName: string): Workspace: Creates a new, empty workspace with the given display name and returns it. This new workspace is not automatically switched to.switchWorkspace(workspace: Workspace): void: Switches the UI to display the provided workspace.
Example: Creating and Switching to a New Workspace
// Assuming 'trace' is the Trace object
const newWorkspace =
  trace.workspaces.createEmptyWorkspace('My Custom Analysis');
trace.workspaces.switchWorkspace(newWorkspace);
console.log(`Switched to workspace: ${newWorkspace.title}`);
Workspace (trace.workspace or an instance from WorkspaceManager)
A Workspace object represents a single layout of tracks, including a main
track area and a pinned track area.
Key properties:
id: string: A unique, session-specific ID for the workspace.title: string: A human-readable title for the workspace (e.g., "" by default, or the name provided to createEmptyWorkspace). Can be modified.userEditable: boolean: Indicates if the user can modify this workspace (default istrue).pinnedTracksNode: TrackNode: A specialTrackNodethat acts as the root for pinned tracks. Tracks added here appear in the pinned area at the top of the timeline.tracks: TrackNode: The main rootTrackNodefor the workspace. All regular tracks and track groups are children of this node.pinnedTracks: ReadonlyArray<TrackNode>: A convenience getter for the children ofpinnedTracksNode.children: ReadonlyArray<TrackNode>: A convenience getter for the children of the maintracksnode.
Key methods:
clear(): void: Removes all tracks from both the main track area and the pinned area.pinTrack(track: TrackNode): void: Adds a lightweight clone (containinguri,name,removableproperties) of the givenTrackNodeto the pinned tracks area.unpinTrack(track: TrackNode): void: Removes a track (matched byuri) from the pinned tracks area.hasPinnedTrack(track: TrackNode): boolean: Checks if a track with the sameurias the giventrackis currently pinned.getTrackById(id: string): TrackNode | undefined: Finds aTrackNode(in either main or pinned areas) by its uniqueid. This is an O(1) operation.getTrackByUri(uri: string): TrackNode | undefined: Finds aTrackNode(in the main tracks area) by itsuri.- Track manipulation methods (delegated to the main
tracksnode):addChildInOrder(child: TrackNode): ResultaddChildLast(child: TrackNode): ResultaddChildFirst(child: TrackNode): ResultaddChildBefore(child: TrackNode, referenceNode: TrackNode): ResultaddChildAfter(child: TrackNode, referenceNode: TrackNode): ResultremoveChild(child: TrackNode): void
flatTracksOrdered: ReadonlyArray<TrackNode>: Returns a flattened list of all descendant nodes in the main track area, in depth-first order.flatTracks: ReadonlyArray<TrackNode>: Returns a flattened list of all descendant nodes in the main track area, in no particular order (more efficient if order doesn't matter).
Track Node (TrackNode)
TrackNode is the fundamental building block for structuring tracks within a
workspace. A TrackNode can represent an individual track (if it has a uri
pointing to a TrackRenderer) or a group of tracks (if it has children).
Creating a TrackNode:
import {TrackNode} from '../../public'; // Adjust path as needed

// Node for an actual track
const myRenderableTrackNode = new TrackNode({
  name: 'My Slice Track',
  uri: 'plugin.id#mySliceTrackUri', // URI of a registered Track
  sortOrder: 100,
  removable: true,
});

// Node for a group
const myGroupNode = new TrackNode({
  name: 'My Analysis Group',
  sortOrder: 50,
  collapsed: false, // Start expanded
});
TrackNodeArgs (Constructor Arguments):
When creating a TrackNode, you can pass an optional object with the following
properties (defined in [TrackNodeArgs]):
name: string: Human-readable name/title for the node.uri: string: If this node represents a renderable track, this is the URI of the registeredTrackRenderer.headless: boolean(defaultfalse): Iftrue, the node's own header/shell is not displayed, and its children are rendered as if they are direct children of this node's parent. Useful for logical grouping without visual nesting.sortOrder: number: A number used for ordering nodes whenaddChildInOrderis called. Higher numbers typically appear first (or as per specific parent implementation).collapsed: boolean(defaulttrue): Whether the node should start in a collapsed state (children hidden).isSummary: boolean(defaultfalse): Iftrue, this track acts as a summary for its children. It gets special styling and behavior (e.g., sticky when expanded).removable: boolean(defaultfalse): Iftrue, a close button is shown, allowing users to remove this node from the workspace.
Key TrackNode Properties:
id: string: A unique, session-specific ID for this node instance.parent: TrackNode | undefined: The parentTrackNode.workspace: Workspace | undefined: TheWorkspacethis node belongs to, if any.children: ReadonlyArray<TrackNode>: An ordered list of childTrackNodes.hasChildren: boolean: True if the node has children.expanded: boolean/collapsed: boolean: Current expansion state.isPinned: boolean: True if this node (or one with the same URI) is in the workspace's pinned area.fullPath: ReadonlyArray<string>: An array of names from the root node to this node, representing its path in the hierarchy.
Key TrackNode Methods:
- Hierarchy Management:
addChildInOrder(child: TrackNode): ResultaddChildLast(child: TrackNode): ResultaddChildFirst(child: TrackNode): ResultaddChildBefore(child: TrackNode, referenceNode: TrackNode): ResultaddChildAfter(child: TrackNode, referenceNode: TrackNode): ResultremoveChild(child: TrackNode): void: Removes a direct child.remove(): void: Removes this node from its parent and unpins it from the workspace.clear(): void: Removes all children of this node.
- State & Appearance:
pin(): void: Pins this track in its workspace.unpin(): void: Unpins this track.expand(): voidcollapse(): voidtoggleCollapsed(): voidreveal(): void: Expands all ancestor nodes to make this node visible.
- Traversal & Querying:
getTrackById(id: string): TrackNode | undefined: Finds a descendant node by itsid(O(1)).getTrackByUri(uri: string): TrackNode | undefined: Finds a descendant node by itsuri(O(1)).flatTracksOrdered: ReadonlyArray<TrackNode>: Flattened list of all descendants (depth-first).flatTracks: ReadonlyArray<TrackNode>: Flattened list of all descendants (unordered, faster).
clone(deep = false): TrackNode: Creates a copy of this node. Ifdeepis true, children are also cloned.
Example: Building a Track Hierarchy
// Assuming 'trace' is the Trace object and 'workspace' is trace.workspace

const parentGroup = new TrackNode({name: 'CPU Analysis'});
workspace.addChildLast(parentGroup);

const cpu0FreqTrack = new TrackNode({
  name: 'CPU 0 Frequency',
  uri: 'perfetto.CpuFrequency#cpu0', // Example URI
  sortOrder: 10,
});
parentGroup.addChildInOrder(cpu0FreqTrack);

const cpu1FreqTrack = new TrackNode({
  name: 'CPU 1 Frequency',
  uri: 'perfetto.CpuFrequency#cpu1', // Example URI
  sortOrder: 20,
});
parentGroup.addChildInOrder(cpu1FreqTrack);

parentGroup.expand(); // Show the CPU frequency tracks
cpu0FreqTrack.pin(); // Pin CPU 0 frequency track
This structure allows plugins to dynamically build complex and organized track
layouts tailored to specific analysis tasks. Remember to register your actual
TrackRenderers using trace.tracks.registerTrack before creating TrackNodes
that reference their URIs.
Commands
Commands are user issuable shortcuts for actions in the UI. They are typically
invoked by the user via the command palette which can be opened by pressing
Ctrl+Shift+P (or Cmd+Shift+P on Mac), or by typing a > into the omnibox,
but can also be invoked programmatically.
Registering Commands
To add a command, the CommandManager (available as app.commands or
trace.commands) provides the registerCommand method for this purpose.
registerCommand(command: {
  id: string;
  name: string;
  callback: (...args: any[]) => any;
  defaultHotkey?: Hotkey
}): void;
Registers a new command. Takes a Command object which looks like this:
id: A unique string which identifies this command. Theidshould be prefixed with the plugin id followed by a#. All commandids must be unique system-wide.name: A human readable name for the command, which is shown in the command palette.callback: The callback which actually performs the action.defaultHotkey: An optional default hotkey for this command.
See hotkey.ts for the available hotkey keys and modifiers.
Note: This is referred to as the 'default' hotkey because we are reserving the right to add a feature in the future where users can modify their hotkeys.
Example
appOrTrace.commands.registerCommand({
  id: `${app.pluginId}#sayHello`,
  name: 'Say hello',
  callback: () => console.log('Hello, world!'),
});
Notes on naming:
- Commands should have ids with the pattern
<pluginId>#doSomething - Commands ids should be prefixed with the id of the plugin which provides them.
- Command names should have the form "Verb something something", and should be
in normal sentence case. I.e. don't capitalize the first letter of each word.
- Good: "Pin janky frame timeline tracks"
- Bad: "Tracks are Displayed if Janky"
Invoking Commands
Besides registering their own commands, plugins can also invoke any existing
command by its ID. This allows plugins to trigger actions provided by other
plugins or by the Perfetto core. The CommandManager (available as
app.commands or trace.commands) provides the runCommand method for this
purpose.
runCommand(commandId: string, ...args: any[]): any;Executes the command identified by commandId, passing any additional arguments
to the command's callback. It returns a Promise that resolves with the result of
the command's callback, if any.
- Args
commandId: The id of the command to run....args: Passed directly to the command callback.
- Returns
any: Whatever is returned from the command callback.
Example:
// PluginA
appOrTrace.commands.registerCommand({
  id: 'PluginA#increment',
  name: 'Increment',
  callback: (num) => num + 1,
});

// PluginB
try {
  const result = appOrTrace.commands.runCommand('PluginA#increment', 1);
  // result should be 2
} catch (e) {
  console.error(`Failed to run command: ${(e as Error).message}`);
}
Plugins can discover command IDs by looking at other plugins' registrations or by referring to documentation for core commands.
Examples:
Tracks
In order to add a new track to the timeline, you'll need to create two entities:
- A track which controls what the track looks like and how it fetches data from trace processor.
- A track node, which is a pointer to a track object and controls where the track appears in a workspace.
Tracks are the main way timeseries data is added to the UI.
To add a track use trace.tracks.registerTrack.
registerTrack(track: {
  uri: string;
  track: TrackRenderer;
  description?: string | (() => m.Children);
  subtitle?: string;
  tags?: TrackTags;
  chips?: ReadonlyArray<string>;
}): void;
Registers a new track with Perfetto. Pass a Track object which includes:
uri: Unique id for this track.track: Track renderer - describes how this track loads data and renders it to the canvas.description: A human readable description or help text for this track.subtitle: Shown underneath the track title.tags: Arbitrary key-value pairs.chipd: A list of strings displayed to the right of the track title.
Track renderers are powerful but complex so it's strongly advised not to create
your own. Instead, by far the easiest way to get started with tracks is to use
the createQuerySliceTrack and createQueryCounterTrack helpers.
Example:
import {createQuerySliceTrack} from '../../components/tracks/query_slice_track';

// ~~ snip ~~

const uri = `${trace.pluginId}#MyTrack`;

// Create a new track renderer based on a query
const renderer = await createQuerySliceTrack({
  trace,
  uri,
  data: {
    sqlSource: 'select * from slice where track_id = 123',
  },
});

// Register the track renderer with the core
trace.tracks.registerTrack({uri, renderer});

// Create a track node that references the track using its uri
const trackNode = new TrackNode({uri, name: 'My Track'});

// Add the track node to the current workspace
trace.workspace.addChildInOrder(trackNode);
See the source for detailed usage.
You can also add a counter track using createQueryCounterTrack which works in
a similar way.
import {createQueryCounterTrack} from '../../components/tracks/query_counter_track';

export default class implements PerfettoPlugin {
  static readonly id = 'com.example.MyPlugin';
  async onTraceLoad(trace: Trace) {
    const title = 'My Counter Track';
    const uri = `${trace.pluginId}#MyCounterTrack`;
    const query = 'select * from counter where track_id = 123';

    // Create a new track renderer based on a query
    const renderer = await createQueryCounterTrack({
      trace,
      uri,
      data: {
        sqlSource: query,
      },
    });

    // Register the track renderer with the core
    trace.tracks.registerTrack({uri, title, renderer});

    // Create a track node that references the track using its uri
    const trackNode = new TrackNode({uri, title});

    // Add the track node to the current workspace
    trace.workspace.addChildInOrder(trackNode);
  }
}
See the source for detailed usage.
Track Descriptions / Help Text
If a description property is provided when registering a track, any
TrackNode that references that track will display a help button in its shell.
When clicked, a popup appears containing the content of the description.
The description can be either a simple string or a function that returns
Mithril vnodes. Using a function is useful for embedding rich content, such as
hyperlinks, into the popup.
For example:
ctx.tracks.registerTrack({
  description: () => {
    return m('', [
      `Shows which threads were running on CPU ${cpu.toString()} over time.`,
      m('br'),
      m(
        Anchor,
        {
          href: 'https://perfetto.dev/docs/data-sources/cpu-scheduling',
          target: '_blank',
          icon: Icons.ExternalLink,
        },
        'Documentation',
      ),
    ]);
  },
  // ...
});
The description property is part of the Track registration rather than the
TrackNode because TrackNodes must be serializable to JSON, and functions
(which description can be) are not.
This has an implication for track groups. If you want to add help text to a
TrackNode that only serves as a group and has no renderable Track associated
with it, you must register a "dummy" track for it. This dummy track can have an
empty renderer but will carry the description.
const uri = `com.example.Tracks#GroupWithHelpText`;

trace.tracks.registerTrack({
  uri,
  renderer: {
    // Empty track renderer
    render: () => {},
  },
  description: () => [
    'This is a group track with some help text.',
    m('br'),
    'Use Mithril vnodes for formatting.',
  ],
});

// Now create the group node referencing the dummy track's URI.
const groupNode = new TrackNode({uri, name: 'Group with Help Text'});
Example: https://github.com/google/perfetto/blob/main/ui/src/plugins/com.example.Tracks/index.ts
Grouping Tracks
Any track can have children. Just add child nodes any TrackNode object using
its addChildXYZ() methods. Nested tracks are rendered as a collapsible tree.
const group = new TrackNode({title: 'Group'});
trace.workspace.addChildInOrder(group);
group.addChildLast(new TrackNode({title: 'Child Track A'}));
group.addChildLast(new TrackNode({title: 'Child Track B'}));
group.addChildLast(new TrackNode({title: 'Child Track C'}));
Tracks nodes with children can be collapsed and expanded manually by the user at
runtime, or programmatically using their expand() and collapse() methods. By
default tracks are collapsed, so to have tracks automatically expanded on
startup you'll need to call expand() after adding the track node.
group.expand();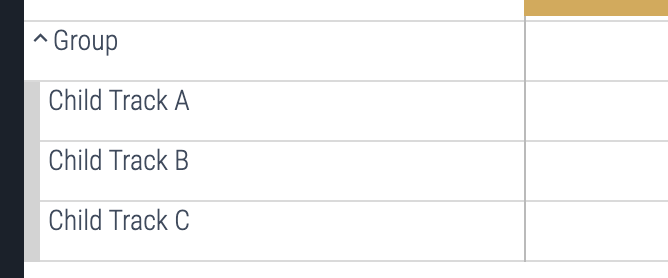
Summary tracks are behave slightly differently to ordinary tracks. Summary tracks:
- Are rendered with a light blue background when collapsed, dark blue when expanded.
- Stick to the top of the viewport when scrolling.
- Area selections made on the track apply to child tracks instead of the summary track itself.
To create a summary track, set the isSummary: true option in its initializer
list at creation time or set its isSummary property to true after creation.
const group = new TrackNode({title: 'Group', isSummary: true});
// ~~~ or ~~~
group.isSummary = true;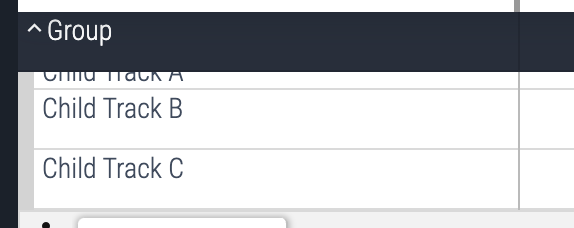
Examples
Track Ordering
Tracks can be manually reordered using the addChildXYZ() functions available
on the track node api, including addChildFirst(), addChildLast(),
addChildBefore(), and addChildAfter().
See the workspace source for detailed usage.
However, when several plugins add tracks to the same node or the workspace, no single plugin has complete control over the sorting of child nodes within this node. Thus, the sortOrder property is be used to decentralize the sorting logic between plugins.
In order to do this we simply give the track a sortOrder and call
addChildInOrder() on the parent node and the track will be placed before the
first track with a greater sortOrder in the list. (i.e. lower sortOrders
appear higher in the stack).
// PluginA
workspace.addChildInOrder(new TrackNode({title: 'Foo', sortOrder: 10}));

// Plugin B
workspace.addChildInOrder(new TrackNode({title: 'Bar', sortOrder: -10}));
Now it doesn't matter which order plugin are initialized, track Bar will
appear above track Foo (unless reordered later).
If no sortOrder is defined, the track assumes a sortOrder of 0.
It is recommended to always use
addChildInOrder()in plugins when adding tracks to theworkspace, especially if you want your plugin to be enabled by default, as this will ensure it respects the sortOrder of other plugins.
DatasetSliceTrack
DatasetSliceTrack is a versatile track renderer class that allows for more
fine-grained control over the behavior and appearance of slice-based tracks.
It's the underlying component used by createQuerySliceTrack but offers a
richer set of customization options.
To use DatasetSliceTrack, you instantiate it with DatasetSliceTrackAttrs,
which include:
trace: TheTraceobject.uri: A unique URI for the track.dataset: This is the core of the track's data. It's aSourceDataset<T>(or a function returning one) that defines the SQL query or table and the schema for the slices.- Required columns:
id(NUM): Unique identifier for each slice.ts(LONG): Timestamp of the event (nanoseconds). This is the start time ifduris present, or the instant time otherwise.
- Optional columns:
dur(LONG): Duration of the event (nanoseconds). If absent, slices are instant.depth(NUM): Vertical arrangement of slices.layer(NUM): Influences mipmap generation; higher layers render on top.
- Required columns:
sliceLayout(optional): An object to customize the geometry and layout of slices (e.g.,padding,rowHeight).instantStyle(optional): An object to define custom rendering for instant events (those without adur). It requires awidthand arenderfunction.colorizer(optional): A function(row: T) => ColorSchemeto dynamically set the color of each slice based on its data.sliceName(optional): A function(row: T) => stringto set the text displayed on each slice. Defaults to thenamecolumn in the dataset.tooltip(optional): A function(slice: SliceWithRow<T>) => m.Childrento provide custom Mithril content for the tooltip when hovering over a slice.detailsPanel(optional): A function(row: T) => TrackEventDetailsPanelto define a custom details panel when a slice is selected.fillRatio(optional): A function(row: T) => number(between 0.0 and 1.0) to render a horizontal bar within the slice, useful for showing utilization or progress.shellButtons(optional): A function() => m.Childrento add custom Mithril-based buttons to the track's shell.initialMaxDepth(optional): An estimate for the maximum depth to stabilize track height during initial load.rootTableName(optional): A base table name for ID namespace resolution.forceTsRenderOrder(optional): If true, forces rendering in timestamp order, which can be useful for tracks with many overlapping instant events, potentially at a small performance cost.
Example:
const trackUri = `${trace.pluginId}#MyCustomSliceTrack`;

// Define your dataset
const myDataset: SourceDataset<MySliceRow> = {
  name: 'my_custom_slices', // A descriptive name
  schema: {
    id: NUM,
    ts: LONG,
    name: STR,
    category: STR,
    dur: LONG, // Assuming your events have duration
    depth: NUM, // Assuming you want to control depth
  },
  query: `
    SELECT
      slice_id as id,
      ts,
      dur,
      depth,
      name,
      category
    FROM my_slice_table_or_view
  `,
};

const renderer = new DatasetSliceTrack<MySliceRow>({
  trace,
  uri: trackUri,
  dataset: myDataset,
  sliceName: (row) => `${row.category}: ${row.name}`,
  colorizer: (row) => {
    if (row.category === 'important') {
      return {background: '#FF0000', foreground: '#FFFFFF'}; // Red
    }
    return {background: '#0000FF', foreground: '#FFFFFF'}; // Blue
  },
  tooltip: (slice) => {
    return m('div', [
      m('div', `Name: ${slice.row.name}`),
      m('div', `Category: ${slice.row.category}`),
      m('div', `Duration: ${formatDuration(trace, slice.dur)}`),
    ]);
  },
  // Add other customizers like detailsPanel, fillRatio etc.
});

// Register the track renderer
trace.tracks.registerTrack({
  uri: trackUri,
  title: 'My Custom Slices',
  renderer,
});

// Add the track node to the workspace as normal
const trackNode = new TrackNode({
  uri: trackUri,
  title: 'My Custom Slices',
});
trace.workspace.addChildInOrder(trackNode);
This approach gives you significant flexibility in how your track data is
queried, processed, and displayed. Remember to consult the source code of
DatasetSliceTrack
and related interfaces for the most up-to-date details and advanced usage
patterns.
Timeline Overlays
Timeline overlays allow plugins to draw on top of the timeline, spanning multiple tracks. This is useful for drawing annotations that show relationships between different tracks, such as flow arrows or vertical lines marking important events.
To create a timeline overlay, you need to implement the Overlay interface and
register it with the track manager.
import {Overlay, TrackBounds} from '../../public';

class MyOverlay implements Overlay {
  render(
    ctx: CanvasRenderingContext2D,
    timescale: TimeScale,
    size: Size2D,
    tracks: ReadonlyArray<TrackBounds>,
  ): void {
    // Drawing logic goes here
  }
}
The render method is called on every frame and provides the following
arguments:
ctx: TheCanvasRenderingContext2Dfor the overlay. This is the main tool for drawing shapes, lines, and text onto the canvas.timescale: ATimeScaleobject that helps convert between trace time and horizontal pixel coordinates. Usetimescale.timeToPx(time)to find the x- coordinate for a given timestamp.size: ASize2Dobject containing thewidthandheightof the entire overlay canvas.tracks: AReadonlyArray<TrackBounds>. EachTrackBoundsobject contains thenodefor a visible track and itsverticalBounds(thetopandbottomy-coordinates of the track on the canvas). This array allows you to find the exact position of any track on the timeline, which is essential for drawing annotations that align with specific tracks.
Once you have your overlay class, register it in your plugin's onTraceLoad
method:
export default class implements PerfettoPlugin {
  static readonly id = 'com.example.MyPlugin';
  async onTraceLoad(trace: Trace) {
    trace.tracks.registerOverlay(new MyOverlay());
  }
}
A good example of a track overlay is the WakerOverlay, which draws arrows
between a thread's waker and the thread itself. You can find the source for this
in ui/src/plugins/dev.perfetto.Sched/waker_overlay.ts.
Tabs
Tabs are a useful way to display contextual information about the trace, the current selection, or to show the results of an operation.
To register a tab from a plugin, use the Trace.registerTab method.
class MyTab implements Tab {
  render(): m.Children {
    return m('div', 'Hello from my tab');
  }

  getTitle(): string {
    return 'My Tab';
  }
}

export default class implements PerfettoPlugin {
  static readonly id = 'com.example.MyPlugin';
  async onTraceLoad(trace: Trace) {
    trace.registerTab({
      uri: `${trace.pluginId}#MyTab`,
      content: new MyTab(),
    });
  }
}
You'll need to pass in a tab-like object, something that implements the Tab
interface. Tabs only need to define their title and a render function which
specifies how to render the tab.
Registered tabs don't appear immediately - we need to show it first. All registered tabs are displayed in the tab dropdown menu, and can be shown or hidden by clicking on the entries in the drop down menu.
Tabs can also be hidden by clicking the little x in the top right of their handle.
Alternatively, tabs may be shown or hidden programmatically using the tabs API.
trace.tabs.showTab(`${trace.pluginId}#MyTab`);
trace.tabs.hideTab(`${trace.pluginId}#MyTab`);
Tabs have the following properties:
- Each tab has a unique URI.
- Only once instance of the tab may be open at a time. Calling showTab multiple times with the same URI will only activate the tab, not add a new instance of the tab to the tab bar.
Ephemeral Tabs
By default, tabs are registered as 'permanent' tabs. These tabs have the following additional properties:
- They appear in the tab dropdown.
- They remain once closed. The plugin controls the lifetime of the tab object.
Ephemeral tabs, by contrast, have the following properties:
- They do not appear in the tab dropdown.
- When they are hidden, they will be automatically unregistered.
Ephemeral tabs can be registered by setting the isEphemeral flag when
registering the tab.
trace.registerTab({
  isEphemeral: true,
  uri: `${trace.pluginId}#MyTab`,
  content: new MyEphemeralTab(),
});
Ephemeral tabs are usually added as a result of some user action, such as running a command. Thus, it's common pattern to register a tab and show the tab simultaneously.
Motivating example:
import m from 'mithril';
import {uuidv4} from '../../base/uuid';

class MyNameTab implements Tab {
  constructor(private name: string) {}
  render(): m.Children {
    return m('h1', `Hello, ${this.name}!`);
  }
  getTitle(): string {
    return 'My Name Tab';
  }
}

export default class implements PerfettoPlugin {
  static readonly id = 'com.example.MyPlugin';
  async onTraceLoad(trace: Trace): Promise<void> {
    trace.registerCommand({
      id: `${trace.pluginId}#AddNewEphemeralTab`,
      name: 'Add new ephemeral tab',
      callback: () => handleCommand(trace),
    });
  }
}

function handleCommand(trace: Trace): void {
  const name = prompt('What is your name');
  if (name) {
    const uri = `${trace.pluginId}#MyName${uuidv4()}`;
    // This makes the tab available to perfetto
    ctx.registerTab({
      isEphemeral: true,
      uri,
      content: new MyNameTab(name),
    });

    // This opens the tab in the tab bar
    ctx.tabs.showTab(uri);
  }
}
Sidebar Menu Items
Plugins can add new entries to the sidebar menu which appears on the left hand side of the UI. These entries can include:
- Commands
- Links
- Arbitrary Callbacks
Commands
If a command is referenced, the command name and hotkey are displayed on the sidebar item.
trace.commands.registerCommand({
  id: 'sayHi',
  name: 'Say hi',
  callback: () => window.alert('hi'),
  defaultHotkey: 'Shift+H',
});

trace.sidebar.addMenuItem({
  commandId: 'sayHi',
  section: 'support',
  icon: 'waving_hand',
});
Links
If an href is present, the sidebar will be used as a link. This can be an internal link to a page, or an external link.
trace.sidebar.addMenuItem({
  section: 'navigation',
  text: 'Plugins',
  href: '#!/plugins',
});
Callbacks
Sidebar items can be instructed to execute arbitrary callbacks when the button is clicked.
trace.sidebar.addMenuItem({
  section: 'current_trace',
  text: 'Copy secrets to clipboard',
  action: () => copyToClipboard('...'),
});
If the action returns a promise, the sidebar item will show a little spinner animation until the promise returns.
trace.sidebar.addMenuItem({
  section: 'current_trace',
  text: 'Prepare the data...',
  action: () => new Promise((r) => setTimeout(r, 1000)),
});
Optional params for all types of sidebar items:
icon- A material design icon to be displayed next to the sidebar menu item. See full list here.tooltip- Displayed on hoversection- Where to place the menu item.navigationcurrent_traceconvert_traceexample_tracessupport
sortOrder- The lower the sortOrder the higher the bar.
See the sidebar source for more detailed usage.
Pages
Pages are entities that can be routed via the URL args, and whose content take up the entire available space to the right of the sidebar and underneath the topbar. Examples of pages are the timeline, record page, and query page, just to name a few common examples.
E.g.
http://ui.perfetto.dev/#!/viewer <-- 'viewer' is the current page.Pages are added from a plugin by calling the pages.registerPage function.
Pages may be registered with the trace or the app contexts. Pages registered with the trace are automatically removed when switching traces. Traces registered on the app will help will appear before a trace is loaded.
Traces registered with the app should be done so in onActivate(), while traces
registered with the trace should be done in onTraceLoad().
A page is simply a render function which is called every Mithril render cycle while that page is active. It should return the mithril components which will be displayed within the page area. Within the render function, just render mithril components as normal.
trace.pages.registerPage({
  route: '/mypage',
  render: () => m('', 'Hello from my page!'),
});
Subpage
The render() callback takes a single argument subpage which is an optional
string that is defined which defines the sub-route if present. E.g. anything
after the first / after the page #!/<route>/<subpage>. This can be used to
add additional sub-sections to your page.
Examples:
Statusbar
Plugins can add items to the statusbar, which is displayed at the bottom of the UI.
To add a statusbar item from a plugin, use the trace.statusbar.registerItem
method.
trace.statusbar.registerItem({
  renderItem: () => ({
    label: 'My Statusbar Item',
    icon: 'settings',
    onclick: () => console.log('Statusbar item clicked'),
  }),
  popupContent: () => m('div', 'Hello from my statusbar item popup'),
});
The renderItem callback should return an object with the following properties:
label: The text to display in the statusbar.icon: An optional material design icon to display next to the label.intent: An optional intent to change the color of the label.onclick: An optional callback to be called when the statusbar item is clicked.
The popupContent callback is optional and should return mithril content to be
displayed in a popup when the statusbar item is clicked.
Omnibox Prompts
Plugins can leverage the omnibox to prompt users for input. This is more
integrated than a standard browser window.prompt() and can be used for
free-form text or selecting from a predefined list of choices. The
OmniboxManager is available via app.omnibox (in onActivate) or
trace.omnibox (in onTraceLoad).
The primary method is prompt():
prompt(text: string): Promise<string | undefined>: For free-form text input.prompt(text: string, choices: ReadonlyArray<string>): Promise<string | undefined>: For selecting from a simple list of strings.prompt<T>(text: string, choices: PromptChoices<T>): Promise<T | undefined>: For selecting from a list of custom objects.PromptChoices<T>requires:values: ReadonlyArray<T>: The array of objects.getName: (x: T) => string: A function to get the display name for each object.
The promise resolves with the user's input/selection, or undefined if the user
dismisses the prompt (e.g., by pressing Escape).
Examples:
1. Free-form input:
// In onActivate or onTraceLoad
// const appOrTrace: App | Trace = ...;

async function askForName(omnibox: OmniboxManager) {
  const name = await omnibox.prompt(
    'Enter a friendly name for the new marker:',
  );
  if (name) {
    console.log(`User entered: ${name}`);
    // Proceed with the name
  } else {
    console.log('User cancelled the prompt.');
  }
}

// To call it:
// askForName(appOrTrace.omnibox);
2. Simple list of choices:
async function chooseColor(omnibox: OmniboxManager) {
  const color = await omnibox.prompt('Choose a highlight color:', [
    'red',
    'green',
    'blue',
    'yellow',
  ]);
  if (color) {
    console.log(`User chose: ${color}`);
    // Apply the color
  }
}

// chooseColor(appOrTrace.omnibox);
3. List of custom objects:
interface ProcessChoice {
  pid: number;
  name: string;
  threadCount: number;
}

async function selectProcess(
  omnibox: OmniboxManager,
  processes: ProcessChoice[],
) {
  const selectedProcess = await omnibox.prompt<ProcessChoice>(
    'Select a process to focus on:',
    {
      values: processes,
      getName: (p) => `${p.name} (PID: ${p.pid}, Threads: ${p.threadCount})`,
    },
  );

  if (selectedProcess) {
    console.log(
      `User selected process: ${selectedProcess.name} (PID: ${selectedProcess.pid})`,
    );
    // Focus on the selected process
  }
}

// const exampleProcesses: ProcessChoice[] = [
//   {pid: 123, name: 'system_server', threadCount: 150},
//   {pid: 456, name: 'com.example.app', threadCount: 25},
// ];
// selectProcess(appOrTrace.omnibox, exampleProcesses);
This feature allows for creating interactive workflows directly within the omnibox, guided by your plugin.
Area Selection Tabs
Plugins can register tabs to be displayed in the details panel when an area of the timeline is selected.
To register an area selection tab, use the
trace.selection.registerAreaSelectionTab method.
trace.selection.registerAreaSelectionTab({
  id: 'my-area-selection-tab',
  name: 'My Area Selection Tab',
  render: (selection) => {
    return m('div', `Selected area: ${selection.start} - ${selection.end}`);
  },
});
The render callback should return mithril content to be displayed in the tab.
The selection argument is an AreaSelection object, which contains
information about the selected area.
Examples:
Metric Visualisations
TBD
Examples:
State
NOTE: It is important to consider version skew when using persistent state.
Plugins can persist information into permalinks. This allows plugins to gracefully handle permalinking and is an opt-in - not automatic - mechanism.
Persistent plugin state works using a Store<T> where T is some JSON
serializable object. Store is implemented
here.
Store allows for reading and writing T. Reading:
interface Foo {
  bar: string;
}

const store: Store<Foo> = getFooStoreSomehow();

// store.state is immutable and must not be edited.
const foo = store.state.foo;
const bar = foo.bar;

console.log(bar);
Writing:
interface Foo {
  bar: string;
}

const store: Store<Foo> = getFooStoreSomehow();

store.edit((draft) => {
  draft.foo.bar = 'Hello, world!';
});

console.log(store.state.foo.bar);
// > Hello, world!
First define an interface for your specific plugin state.
interface MyState {
  favouriteSlices: MySliceInfo[];
}
To access permalink state, call mountStore() on your Trace object, passing
in a migration function.
export default class implements PerfettoPlugin {
  static readonly id = 'com.example.MyPlugin';
  async onTraceLoad(trace: Trace): Promise<void> {
    const store = trace.mountStore(migrate);
  }
}

function migrate(initialState: unknown): MyState {
  // ...
}
When it comes to migration, there are two cases to consider:
- Loading a new trace
- Loading from a permalink
In case of a new trace, your migration function is called with undefined. In
this case you should return a default version of MyState:
const DEFAULT = {favouriteSlices: []};

function migrate(initialState: unknown): MyState {
  if (initialState === undefined) {
    // Return default version of MyState.
    return DEFAULT;
  } else {
    // Migrate old version here.
  }
}
In the permalink case, your migration function is called with the state of the plugin store at the time the permalink was generated. This may be from an older or newer version of the plugin.
Plugins must not make assumptions about the contents of initialState!
In this case you need to carefully validate the state object. This could be achieved in several ways, none of which are particularly straight forward. State migration is difficult!
One brute force way would be to use a version number.
interface MyState {
  version: number;
  favouriteSlices: MySliceInfo[];
}

const VERSION = 3;
const DEFAULT = {favouriteSlices: []};

function migrate(initialState: unknown): MyState {
  if (initialState && (initialState as {version: any}).version === VERSION) {
    // Version number checks out, assume the structure is correct.
    return initialState as State;
  } else {
    // Null, undefined, or bad version number - return default value.
    return DEFAULT;
  }
}
You'll need to remember to update your version number when making changes! Migration should be unit-tested to ensure compatibility.
Examples:
Feature Flags
Plugins can register feature flags, which allow users to toggle experimental or
developmental features on or off. This is useful for rolling out new
functionality gradually or providing options for advanced users. Feature flags
are typically registered in the onActivate lifecycle hook using the
app.featureFlags manager.
Note: Feature flags are best suited for gating new or experimental features during development and rollout. They work well as temporary toggles that have a plan to be removed once the feature is stable (either by making it the default behavior or removing it entirely). If a feature needs ongoing user configuration, consider using Custom Settings instead, as they provide a better user experience for permanent preferences.
To register a feature flag, you provide FlagSettings:
id(string): A unique identifier for the flag (e.g., "com.example.MyPlugin#myCoolFeature").defaultValue(boolean): The default state of the flag (true for on, false for off).description(string): A detailed description shown to the user in the UI (e.g., in the flags page).name(string, optional): A human-readable name for the flag. If omitted, theidis used.devOnly(boolean, optional): If true, the flag will only be visible in developer builds of Perfetto.
The register method returns a Flag object, which provides methods to
interact with the flag's state:
get(): boolean: Returns the current value of the flag.set(value: boolean): Overrides the flag's current value and persists it.isOverridden(): boolean: Checks if the flag's value has been manually changed from its default.reset(): Resets the flag to itsdefaultValue.overriddenState(): OverrideState: Returns the current override state (DEFAULT,OVERRIDE_TRUE,OVERRIDE_FALSE).
Example:
import {Flag, FlagSettings} from '../../public/featureflag'; // Adjust path as needed
import {App} from '../../public/app';
import {PerfettoPlugin} from '../../public/plugin';
import {Trace} from '../../public/trace';

export default class MyFeatureFlagPlugin implements PerfettoPlugin {
  static readonly id = 'com.example.MyFeatureFlagPlugin';
  private static enableExperimentalTracks: Flag;

  static onActivate(app: App): void {
    // Register a feature flag to control experimental tracks
    this.enableExperimentalTracks = app.featureFlags.register({
      id: `${this.id}#enableExperimentalTracks`,
      name: 'Enable Experimental Memory Tracks',
      defaultValue: false,
      description:
        'Enables experimental memory analysis tracks that show detailed heap allocations and memory pressure events. These tracks are under active development.',
      devOnly: true, // Only visible in development builds
    });

    // Register a command that's only available when the flag is enabled
    if (this.enableExperimentalTracks.get()) {
      app.commands.registerCommand({
        id: `${this.id}#analyzeMemoryLeaks`,
        name: 'Analyze potential memory leaks',
        callback: () => console.log('Running experimental leak detection...'),
      });
    }
  }

  async onTraceLoad(trace: Trace): Promise<void> {
    // Only add experimental tracks if the feature flag is enabled
    if (MyFeatureFlagPlugin.enableExperimentalTracks.get()) {
      // ... add the track ...
    }
  }
}
Users can typically manage these flags through a dedicated "Flags" page in the Perfetto UI, where they can see descriptions and toggle them.
Custom Settings
Plugins can define and register their own settings, allowing users to customize
plugin behavior. These settings are managed through the SettingsManager,
available via app.settings (typically in onActivate) or trace.settings.
Registered settings appear in the main Perfetto settings page.
To register a setting, you provide a SettingDescriptor<T>:
id(string): A unique identifier for the setting (e.g., "com.example.MyPlugin#myCustomPreference"). This is also used as the storage key.name(string): A human-readable name displayed in the settings UI.description(string): A detailed explanation of what the setting does.schema(z.ZodType<T>): A Zod schema that defines the type and validation rules for the setting's value. This is crucial for ensuring type safety and data integrity.defaultValue(T): The value the setting will have if not explicitly set by the user.requiresReload(boolean, optional): Iftrue, the user will be prompted to reload the Perfetto UI when this setting is changed, as its effect might only apply on startup.render(SettingRenderer<T>, optional): A function(setting: Setting<T>) => m.Childrenthat returns Mithril content to render a custom UI for this setting in the settings page. This is particularly useful for non-primitive types (objects, arrays) or when a more specialized input control is needed (e.g., a slider, a custom dropdown). If not provided, a default UI based on the schema type (e.g., checkbox for boolean, text input for string/number) will be attempted.
The settings.register() method returns a Setting<T> object, which extends
the descriptor and provides methods to interact with the setting:
get(): T: Retrieves the current value of the setting.set(value: T): Sets a new value for the setting. The value will be validated against the schema.reset(): Reverts the setting to itsdefaultValue.isDefault: boolean: A read-only property indicating if the setting is currently at its default value.
Example:
import {Setting, SettingDescriptor} from '../../public/setting'; // Adjust path as needed
import {App} from '../../public/app';
import {PerfettoPlugin} from '../../public/plugin';
import {Trace} from '../../public/trace';
import {z} from 'zod';
import m from 'mithril';

// Define a Zod schema for a complex setting
const MyComplexObjectSchema = z.object({
  optionA: z.string().min(1),
  optionB: z.number().int().positive(),
});
type MyComplexObject = z.infer<typeof MyComplexObjectSchema>;

export default class MySettingsPlugin implements PerfettoPlugin {
  static readonly id = 'com.example.MySettingsPlugin';
  private static simpleBooleanSetting: Setting<boolean>;
  private static complexObjectSetting: Setting<MyComplexObject>;

  static onActivate(app: App): void {
    // 1. A simple boolean setting
    this.simpleBooleanSetting = app.settings.register({
      id: `${this.id}#enableSimpleFeature`,
      name: 'Enable Simple Feature',
      description: 'Toggles a basic feature on or off.',
      schema: z.boolean(),
      defaultValue: true,
      requiresReload: false,
    });

    // 2. A more complex object-based setting with a custom renderer
    this.complexObjectSetting = app.settings.register({
      id: `${this.id}#complexConfig`,
      name: 'Complex Configuration',
      description: 'Configure advanced options A and B.',
      schema: MyComplexObjectSchema,
      defaultValue: {optionA: 'defaultA', optionB: 10},
      render: (setting: Setting<MyComplexObject>) => {
        const currentValue = setting.get();
        return m('div.custom-setting-container', [
          m('label', 'Option A:'),
          m('input[type=text]', {
            value: currentValue.optionA,
            oninput: (e: Event) => {
              const target = e.target as HTMLInputElement;
              setting.set({...currentValue, optionA: target.value});
            },
          }),
          m('label', 'Option B (number):'),
          m('input[type=number]', {
            value: currentValue.optionB,
            oninput: (e: Event) => {
              const target = e.target as HTMLInputElement;
              setting.set({
                ...currentValue,
                optionB: parseInt(target.value, 10) || 0,
              });
            },
          }),
          m('button', {onclick: () => setting.reset()}, 'Reset to Default'),
          setting.isDefault ? m('span', ' (Default)') : null,
        ]);
      },
    });

    // Using the setting value
    if (this.simpleBooleanSetting.get()) {
      console.log('Simple feature is ON');
    }
    const complexConf = this.complexObjectSetting.get();
    console.log(
      `Complex config: A=${complexConf.optionA}, B=${complexConf.optionB}`,
    );
  }

  async onTraceLoad(trace: Trace) {
    // Use the setting in onTraceLoad
    if (MySettingsPlugin.simpleBooleanSetting.get()) {
      console.log('Simple feature is ON');
    }
  }
}
Using Zod schemas ensures that settings are type-safe and validated, preventing invalid data from being stored. Custom renderers provide a powerful way to create intuitive UIs for complex settings.
Examples:
Logging Analytics and Errors
Plugins can contribute to Perfetto's internal analytics by logging custom events
and errors. This helps in understanding feature usage and identifying issues.
The analytics interface is available via app.analytics (in onActivate) or
trace.analytics (in onTraceLoad).
The Analytics interface provides the following methods:
logEvent(category: TraceCategories | null, event: string): void: Logs a specific event.category: Can be one of the predefinedTraceCategories(e.g.,'Trace Actions','Record Trace','User Actions') ornullfor general plugin events. It's recommended to usenullor a very specific event string if your plugin's actions don't fit predefined categories, to avoid polluting general metrics.event: A string describing the event (e.g., "MyPlugin:FeatureUsed", "MyPlugin:SpecificActionCompleted").
logError(err: ErrorDetails): void: Logs an error.err: AnErrorDetailsobject, which typically includes an error message, and can include a stack trace or other context.
isEnabled(): boolean: Checks if analytics logging is currently enabled. Plugins should respect this and avoid logging if it returnsfalse.
Example:
import {App, Trace, Analytics, ErrorDetails} from '../../public'; // Adjust path

export default class implements PerfettoPlugin {
  static readonly id = 'com.example.MyAnalyticsPlugin';

  static onActivate(app: App): void {
    if (app.analytics.isEnabled()) {
      app.analytics.logEvent(null, `${this.id}:Activated`);
    }
  }

  async onTraceLoad(trace: Trace): Promise<void> {
    if (trace.analytics.isEnabled()) {
      trace.analytics.logEvent('User Actions', `${this.id}:TraceLoaded`);
    }

    // Example of logging a custom action
    this.performSomeAction(trace.analytics);
  }

  private performSomeAction(analytics: Analytics) {
    try {
      // ... some plugin logic ...
      if (analytics.isEnabled()) {
        analytics.logEvent(null, `${MyAnalyticsPlugin.id}:SomeActionSuccess`);
      }
    } catch (e) {
      if (analytics.isEnabled()) {
        const errorDetails: ErrorDetails = {
          message: `Error in ${MyAnalyticsPlugin.id}.performSomeAction: ${
            (e as Error).message
          }`,
          stack: (e as Error).stack,
        };
        analytics.logError(errorDetails);
      }
      // Optionally re-throw or handle the error
    }
  }
}
By using the provided analytics interface, plugins can integrate their telemetry with the main application in a consistent way.
Adding Timeline Notes and Spans
Plugins can add visual markers (notes) and highlighted time ranges (span notes)
directly onto the timeline. This is useful for drawing attention to specific
points or durations based on plugin-specific logic or user actions. The
NoteManager is available via trace.notes within the onTraceLoad hook or
any context where the Trace object is accessible.
Key Interfaces:
Note: Represents a single point-in-time marker on the timeline.timestamp(time): The exact time for the note.color(string, optional): Color of the note marker. Defaults to a random color.text(string, optional): Text displayed when hovering over the note.id(string, optional): A unique ID. If provided, can be used to update an existing note. Auto-assigned if omitted.
SpanNote: Represents a highlighted time range.start(time): The start time of the span.end(time): The end time of the span.color,text,id: Same as forNote.
Using the NoteManager:
trace.notes.addNote(args: AddNoteArgs): string: Adds a point note to the timeline and returns its ID.trace.notes.addSpanNote(args: AddSpanNoteArgs): string: Adds a span note to the timeline and returns its ID.trace.notes.getNote(id: string): Note | SpanNote | undefined: Retrieves a previously added note or span note by its ID.
Example:
import {Trace, time} from '../../public'; // Adjust path as needed

export default class implements PerfettoPlugin {
  static readonly id = 'com.example.MyTimelineNotesPlugin';

  async onTraceLoad(trace: Trace): Promise<void> {
    // Example: Add a point note at 10 seconds into the trace
    const noteId = trace.notes.addNote({
      timestamp: time.fromSeconds(10),
      text: 'Interesting event occurred here!',
      color: '#FF00FF', // Magenta
    });
    console.log(`Added note with ID: ${noteId}`);

    // Example: Add a span note from 15s to 20s
    const spanNoteId = trace.notes.addSpanNote({
      start: time.fromSeconds(15),
      end: time.fromSeconds(20),
      text: 'Critical duration under investigation',
      color: 'rgba(255, 165, 0, 0.5)', // Orange, semi-transparent
    });
    console.log(`Added span note with ID: ${spanNoteId}`);

    // Later, you could retrieve a note if needed
    const retrievedNote = trace.notes.getNote(noteId);
    if (retrievedNote) {
      console.log('Retrieved note text:', retrievedNote.text);
    }
  }
}
These notes are visually represented on the timeline's marker track, providing a way for plugins to annotate the trace dynamically.
Controlling the Minimap
Plugins can provide custom data to be displayed on the global timeline minimap.
This allows visualization of high-level overviews of plugin-specific data across
the entire trace duration. The MinimapManager is available via trace.minimap
within the onTraceLoad hook.
To contribute content, a plugin must register a MinimapContentProvider:
priority(number): If multiple plugins provide minimap providers, the one with the highest priority wins and takes full control over the minimap.getData(timeSpan: HighPrecisionTimeSpan, resolution: duration): Promise<MinimapRow[]>: A function called by the UI to fetch minimap data for a giventimeSpanat a specificresolution.- It should return a Promise that resolves to an array of
MinimapRow. - Each
MinimapRowis an array ofMinimapCellobjects. - Each
MinimapCelldefines:ts(time): The start timestamp of the cell.dur(duration): The duration this cell covers.load(number): A normalized value (0.0 to 1.0) representing the intensity or utilization for this cell. This value is used by the UI to render the cell's visual representation (e.g., color intensity).
- It should return a Promise that resolves to an array of
Using the MinimapManager:
trace.minimap.registerContentProvider(provider: MinimapContentProvider): void: Registers your custom provider.
Example:
import {
  Trace,
  MinimapContentProvider,
  MinimapRow,
  MinimapCell,
  HighPrecisionTimeSpan,
  duration,
  time,
} from '../../public'; // Adjust path

class MyMinimapDataProvider implements MinimapContentProvider {
  readonly priority = 10; // Example priority

  async getData(
    timeSpan: HighPrecisionTimeSpan,
    resolution: duration,
  ): Promise<MinimapRow[]> {
    // In a real implementation, you would query Trace Processor or use other
    // plugin data sources to generate cells based on the timeSpan and resolution.
    // This example generates a single row with some dummy data.

    const cells: MinimapCell[] = [];
    let currentTs = timeSpan.start;
    const step = resolution; // Use the provided resolution as step

    while (currentTs < timeSpan.end) {
      const cellEnd = time.add(currentTs, step);
      cells.push({
        ts: currentTs,
        dur: step,
        // Generate some load, e.g., based on activity in your plugin's data
        load: Math.random(), // Replace with actual data calculation
      });
      currentTs = cellEnd;
      if (cells.length > 1000) break; // Safety break for dummy data
    }

    // Plugins can return multiple rows if they want to represent different
    // layers or types of data in the minimap.
    return [cells];
  }
}

export default class implements PerfettoPlugin {
  static readonly id = 'com.example.MyMinimapPlugin';

  async onTraceLoad(trace: Trace): Promise<void> {
    const provider = new MyMinimapDataProvider();
    trace.minimap.registerContentProvider(provider);
    console.log('MyMinimapDataProvider registered.');
  }
}
The UI will then call the getData method of registered providers as needed
when the minimap needs to be redrawn, allowing plugins to contribute dynamic,
trace-wide overviews.
Plugin Dependencies
Plugins can declare dependencies on other plugins. This ensures that the dependent plugins are loaded and available before the current plugin is activated and loaded. This is useful when a plugin needs to extend or utilize functionality provided by another plugin.
Declaring Dependencies:
A plugin declares its dependencies via a static dependencies array in its
class definition. This array should contain direct references to the static
classes of the plugins it depends on.
// plugin-a.ts
import {PerfettoPlugin, PerfettoPluginStatic, App, Trace} from '../../public';

export default class PluginA implements PerfettoPlugin {
  static readonly id = 'com.example.PluginA';
  // ...
  doSomething(): string {
    return 'Data from Plugin A';
  }
}

// plugin-b.ts
import {PerfettoPlugin, PerfettoPluginStatic, App, Trace} from '../../public';
import PluginA from './plugin-a'; // Import the static class

export default class PluginB implements PerfettoPlugin {
  static readonly id = 'com.example.PluginB';
  static readonly dependencies = [PluginA]; // Declare PluginA as a dependency

  private pluginAInstance?: PluginA;

  async onTraceLoad(ctx: Trace): Promise<void> {
    // Get an instance of the dependency
    this.pluginAInstance = ctx.plugins.getPlugin(PluginA);

    if (this.pluginAInstance) {
      const dataFromA = this.pluginAInstance.doSomething();
      console.log(`${PluginB.id} received: ${dataFromA}`);
      // Use dataFromA or other methods from pluginAInstance
    } else {
      console.error(`${PluginB.id} could not get instance of ${PluginA.id}`);
    }
  }
}
Accessing Dependencies:
Once a plugin is loaded (e.g., within onActivate or onTraceLoad), it can get
an instance of a declared dependency using the plugins.getPlugin() method
available on the App or Trace context object. You pass the static class of
the dependency to this method.
app.plugins.getPlugin<T extends PerfettoPlugin>(plugin: PerfettoPluginStatic<T>): Ttrace.plugins.getPlugin<T extends PerfettoPlugin>(plugin: PerfettoPluginStatic<T>): T
The core ensures that onActivate and onTraceLoad for dependencies are called
before they are called for the dependent plugin. If a dependency cannot be
loaded, the dependent plugin might not load or might receive undefined when
trying to get the plugin instance.
Example:
The
dev.perfetto.TraceProcessorTrack
plugin depends on ProcessThreadGroupsPlugin and StandardGroupsPlugin to
organize tracks under appropriate process, thread, or standard groups.
// From ui/src/plugins/dev.perfetto.TraceProcessorTrack/index.ts
import ProcessThreadGroupsPlugin from '../dev.perfetto.ProcessThreadGroups';
import StandardGroupsPlugin from '../dev.perfetto.StandardGroups';
// ...

export default class TraceProcessorTrackPlugin implements PerfettoPlugin {
  static readonly id = 'dev.perfetto.TraceProcessorTrack';
  static readonly dependencies = [
    ProcessThreadGroupsPlugin,
    StandardGroupsPlugin,
  ];

  // ...
  private addTrack(
    ctx: Trace,
    // ...
  ) {
    // ...
    const processGroupPlugin = ctx.plugins.getPlugin(ProcessThreadGroupsPlugin);
    const standardGroupPlugin = ctx.plugins.getPlugin(StandardGroupsPlugin);
    // Use instances of processGroupPlugin and standardGroupPlugin...
  }
}
By declaring dependencies, plugins can build upon each other, creating a more modular and extensible system.
Default plugins
Some plugins are enabled by default. These plugins are held to a higher quality than non-default plugins since changes to those plugins effect all users of the UI. The list of default plugins is specified at ui/src/core/default_plugins.ts.
In particular the startup time of your plugin will be scrutinized and your plugin may be disabled by default if it has a significant impact on users who aren't using your plugin's features. To see a list of plugins and their startup times, visit the plugins page and sort plugins by their startup time.
The majority of default plugins are Android and Chrome related due to the lineage of the Perfetto project, ui.perfetto.dev is mostly to server the Android and Chrome telemetry teams.
Misc notes
- Plugins must be licensed under Apache-2.0 the same as all other code in the repository.
- Plugins